Configure Google Workspace as the user directory for Arculix
Organizations using Google Workspace for user management can enhance security by integrating Arculix for multi-factor authentication (MFA). With this setup, users continue to use their Google Workspace credentials for access, while benefiting from Arculix’s advanced features, including MFA, risk-based policies, and support for SAML and OpenID Connect (OIDC).
To configure Google Workspace as the user directory for Arculix, the following is an outline of tasks to complete.
- Task A: Configure OAuth Client on Google API and Services
Create an OAuth Client for Arculix in the Google API Console.
You will need the client credentials generated by Google for Arculix configuration.
- Task B: Configure Federation Logins for Google Workspace on Arculix
Create a new provider for Google Workspace in Arculix. Configure it as a federated client and enable SSO logins via Google Workspace.
- Task C: Configure MFA for New Users in Arculix
Create a Device Enrollment Policy to allow new users to enroll in MFA using the Arculix Mobile app.
Task A: Configure OAuth Client on Google API and Services
In this task, you will create an OAuth client in the Google API console and set its redirect URI to Arculix.
Note
This task is completed in the Google API Console. For up-to-date, detailed instructions, refer to Google's documentation for OpenID Connect and reach out to their support resources.
Log in to the Google API Console and create an OAuth client for Arculix.
In the Authorized redirect URIs section, set the redirect URI to the callback URL for your Arculix tenant.
For example:
https://oidc.acceptto.com/{YOUR_TENANT}/federation/oauth/callback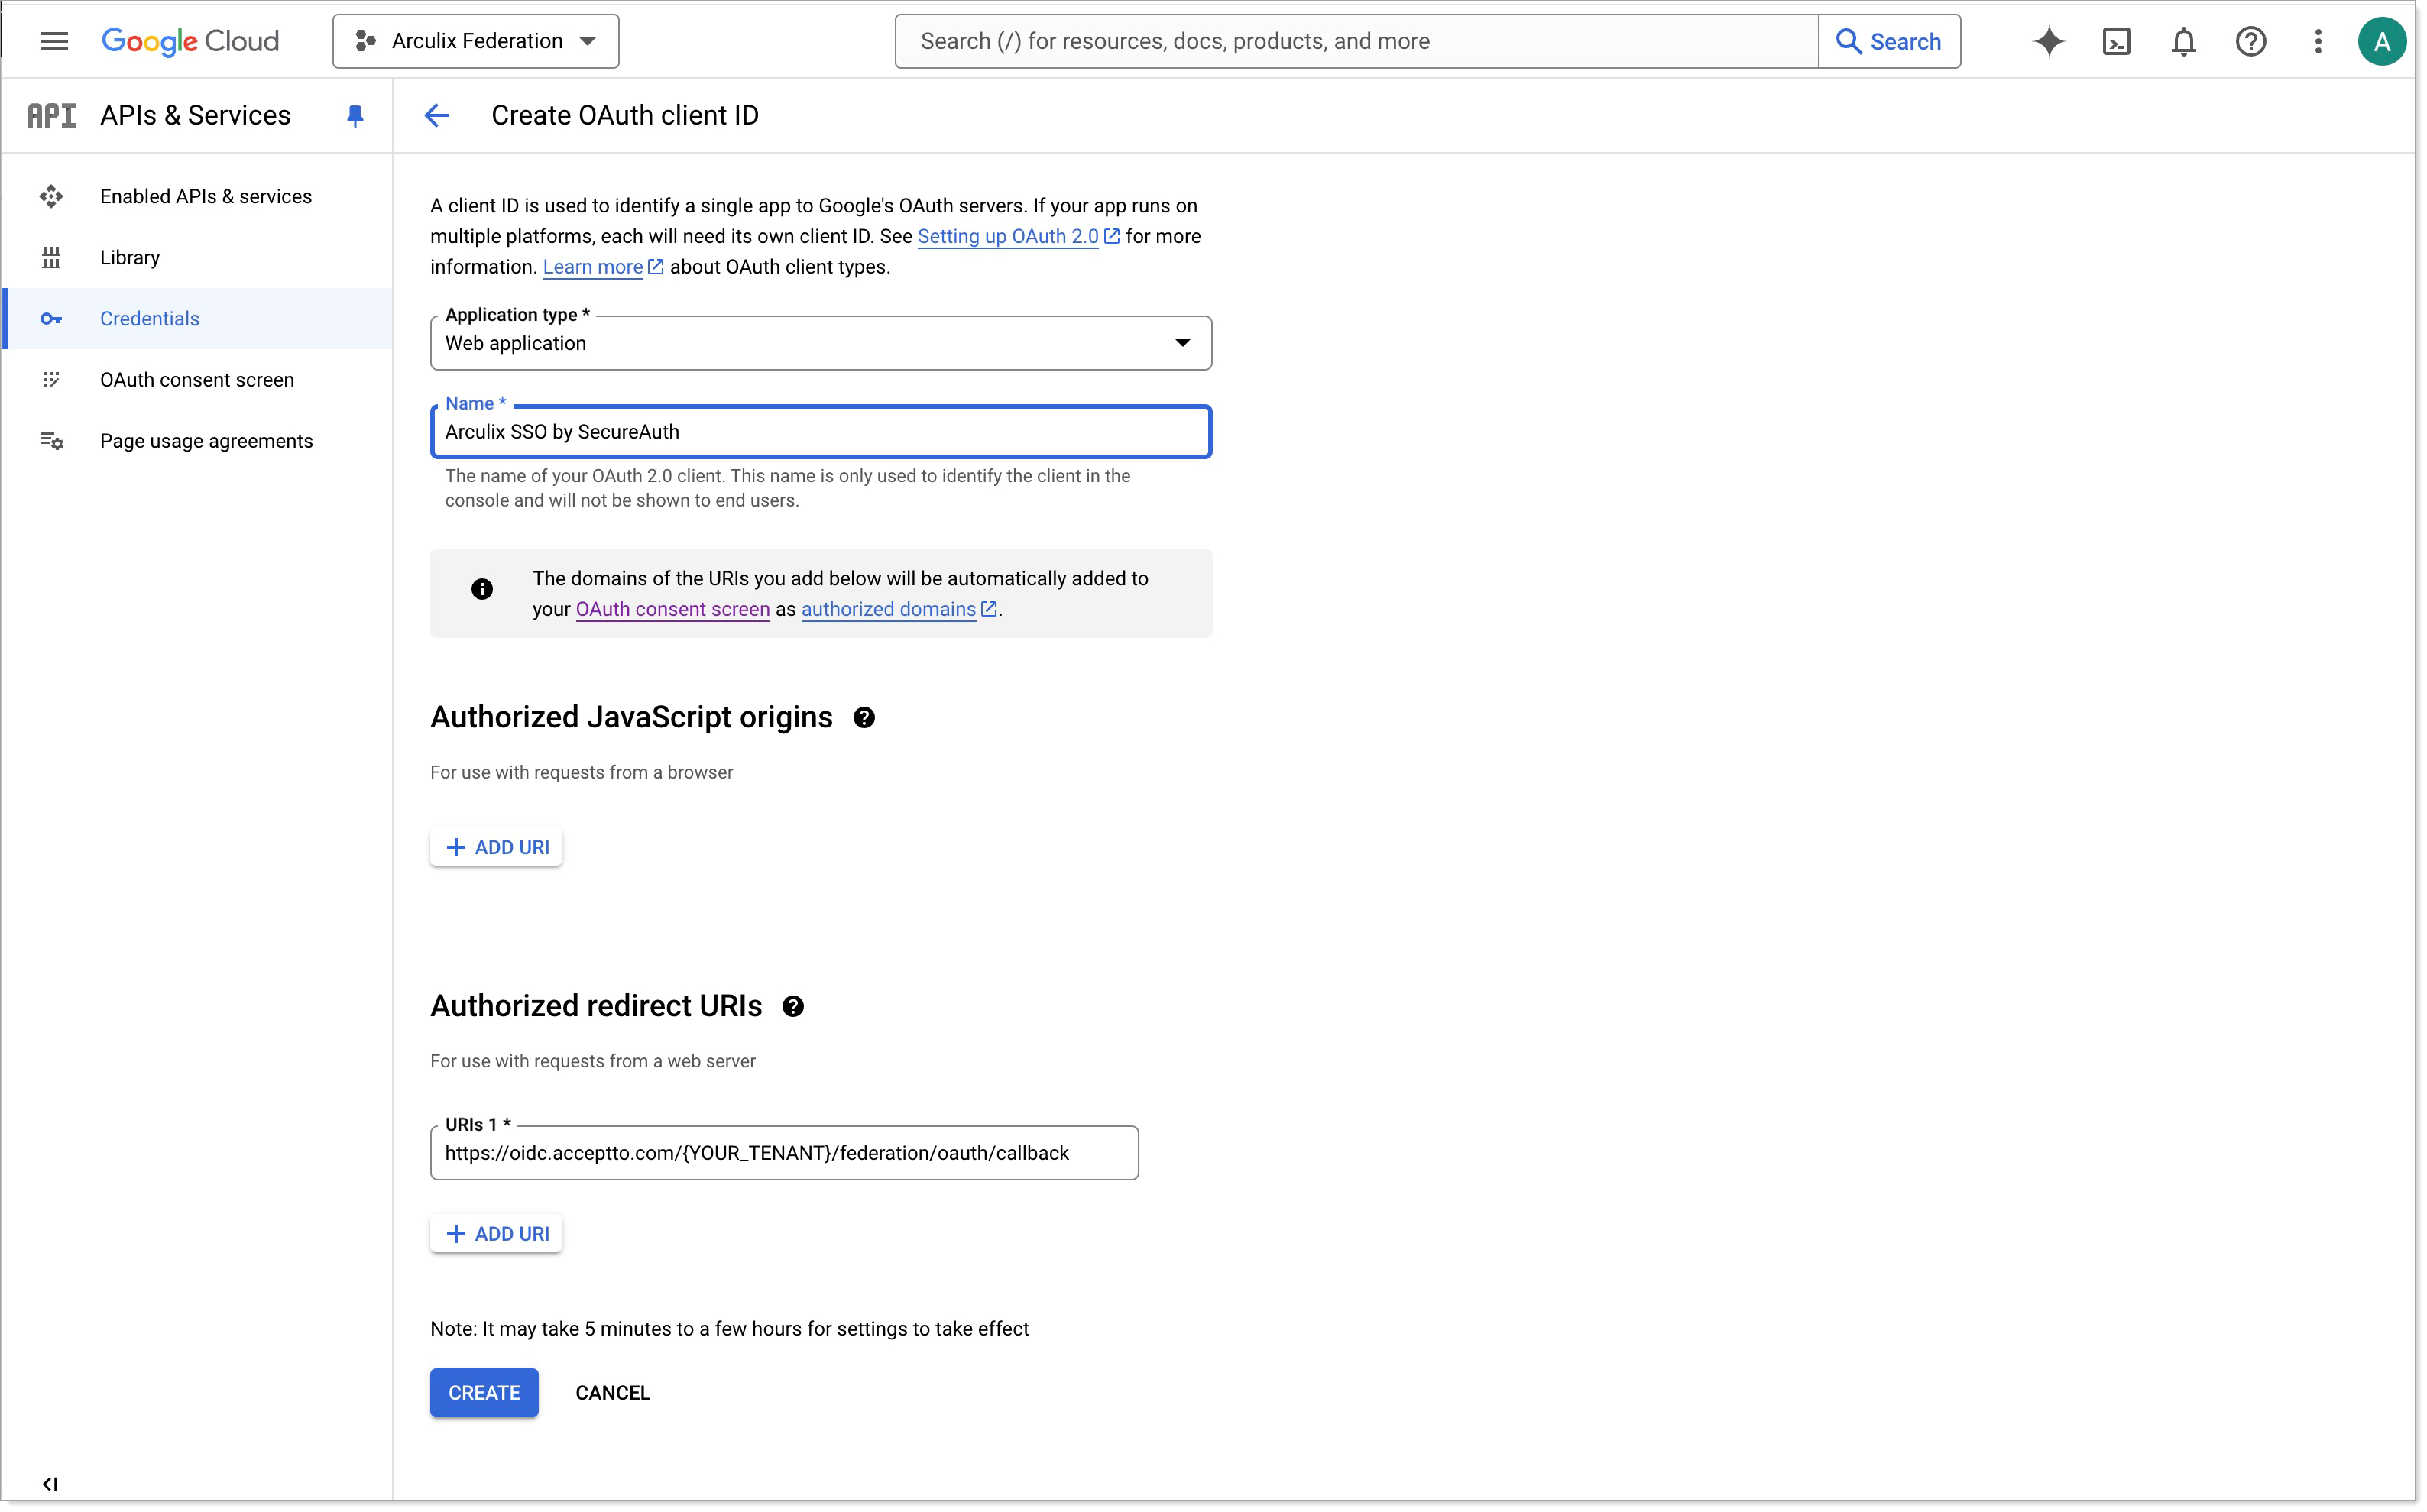
Once the OAuth consent page and web application credentials are configured, copy the client's credentials for Arculix configuration.
Task B: Configure federation logins for Google Workspace on Arculix
In this task, you will create a provider for Google Workspace in Arculix, configure it as a federated client, and enable SSO logins via Google Workspace.
Log in to Arculix with an administrative account and go to External IdPs > Providers.
Click Create New Provider.
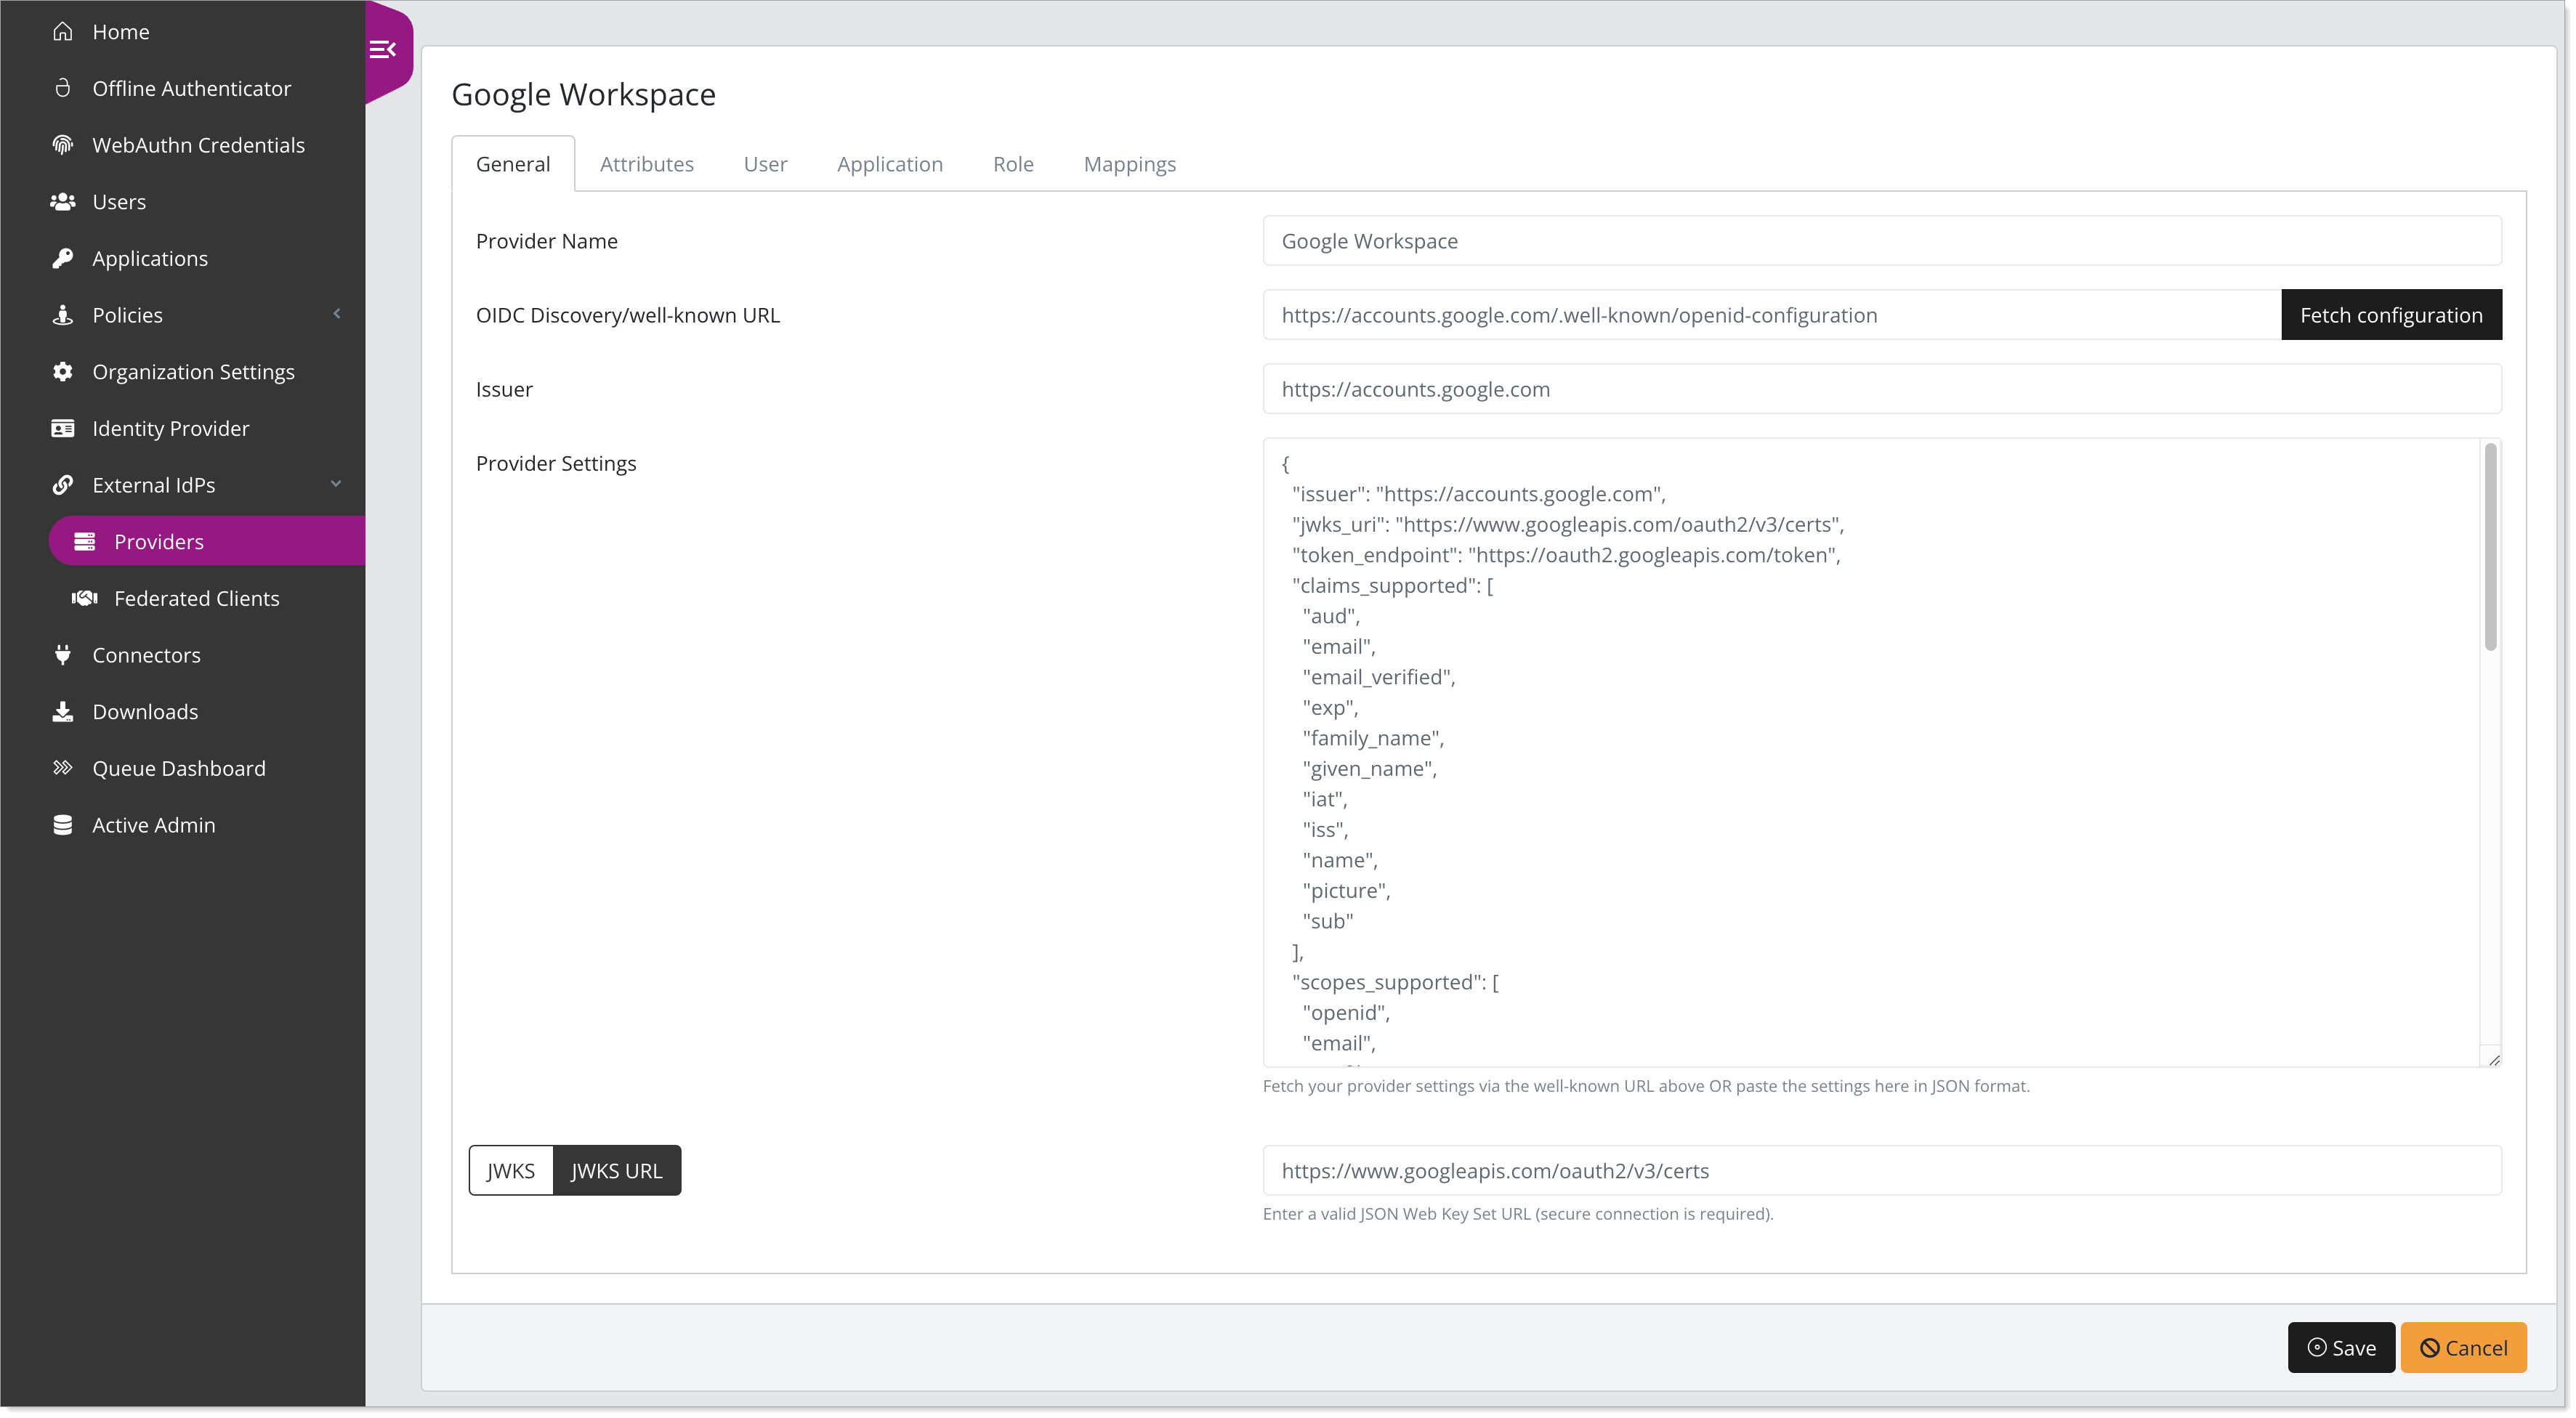
In the New Provider form, on the General tab, set the following configurations:
Provider Name
Set the name of the provider.
For example, Google Workspace.
OIDC Discovery/well-known URL
Enter Google's OpenID configuration file URL:
https://accounts.google.com/.well-known/openid-configurationClick Fetch Configuration to automatically retrieve Google’s OIDC configuration.
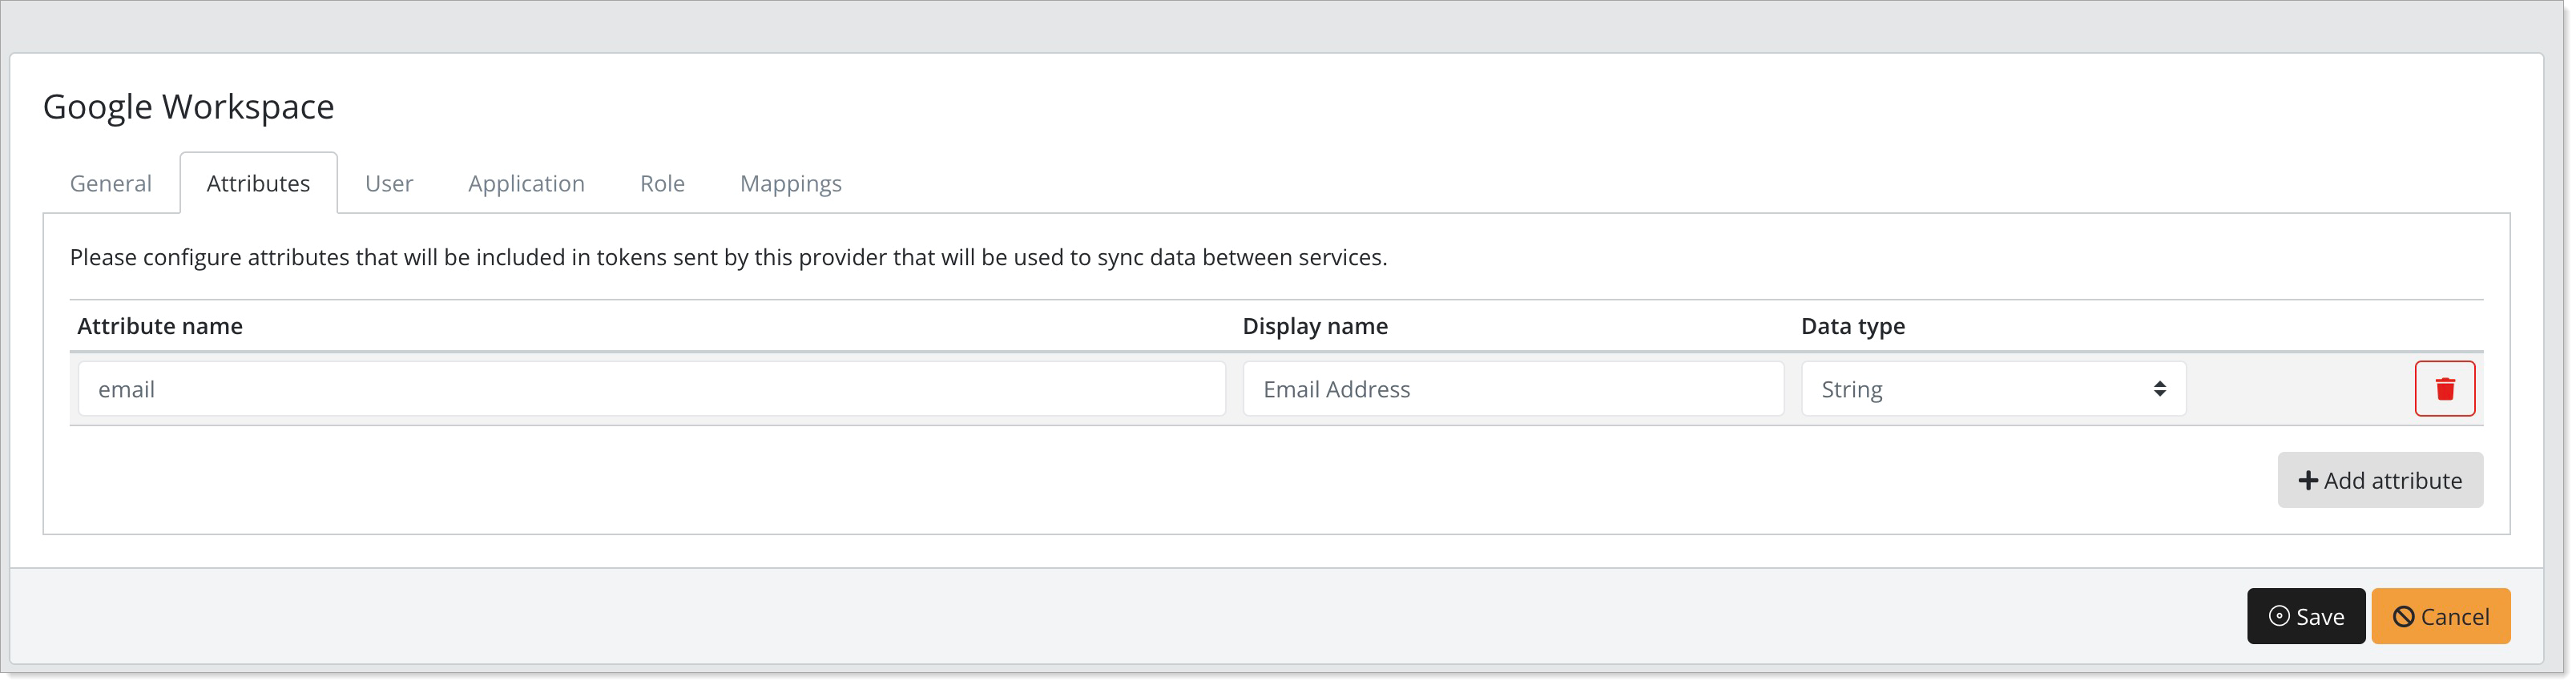
Select the Attributes tab and configure the username source.
In most situations, selecting email as the source will match typical setups.
Select the User tab and set the following configurations:
Token Attribute
Select the Other radio button and set to Email Address.
User Attribute
Set to Username.
User Synchronization
Optional. Configure this section to enable Just-in-Time Provisioning. Arculix will create new user upon first sign in, if they don't already exist.

Save your changes.
Go to External IdPs > Federated Clients.
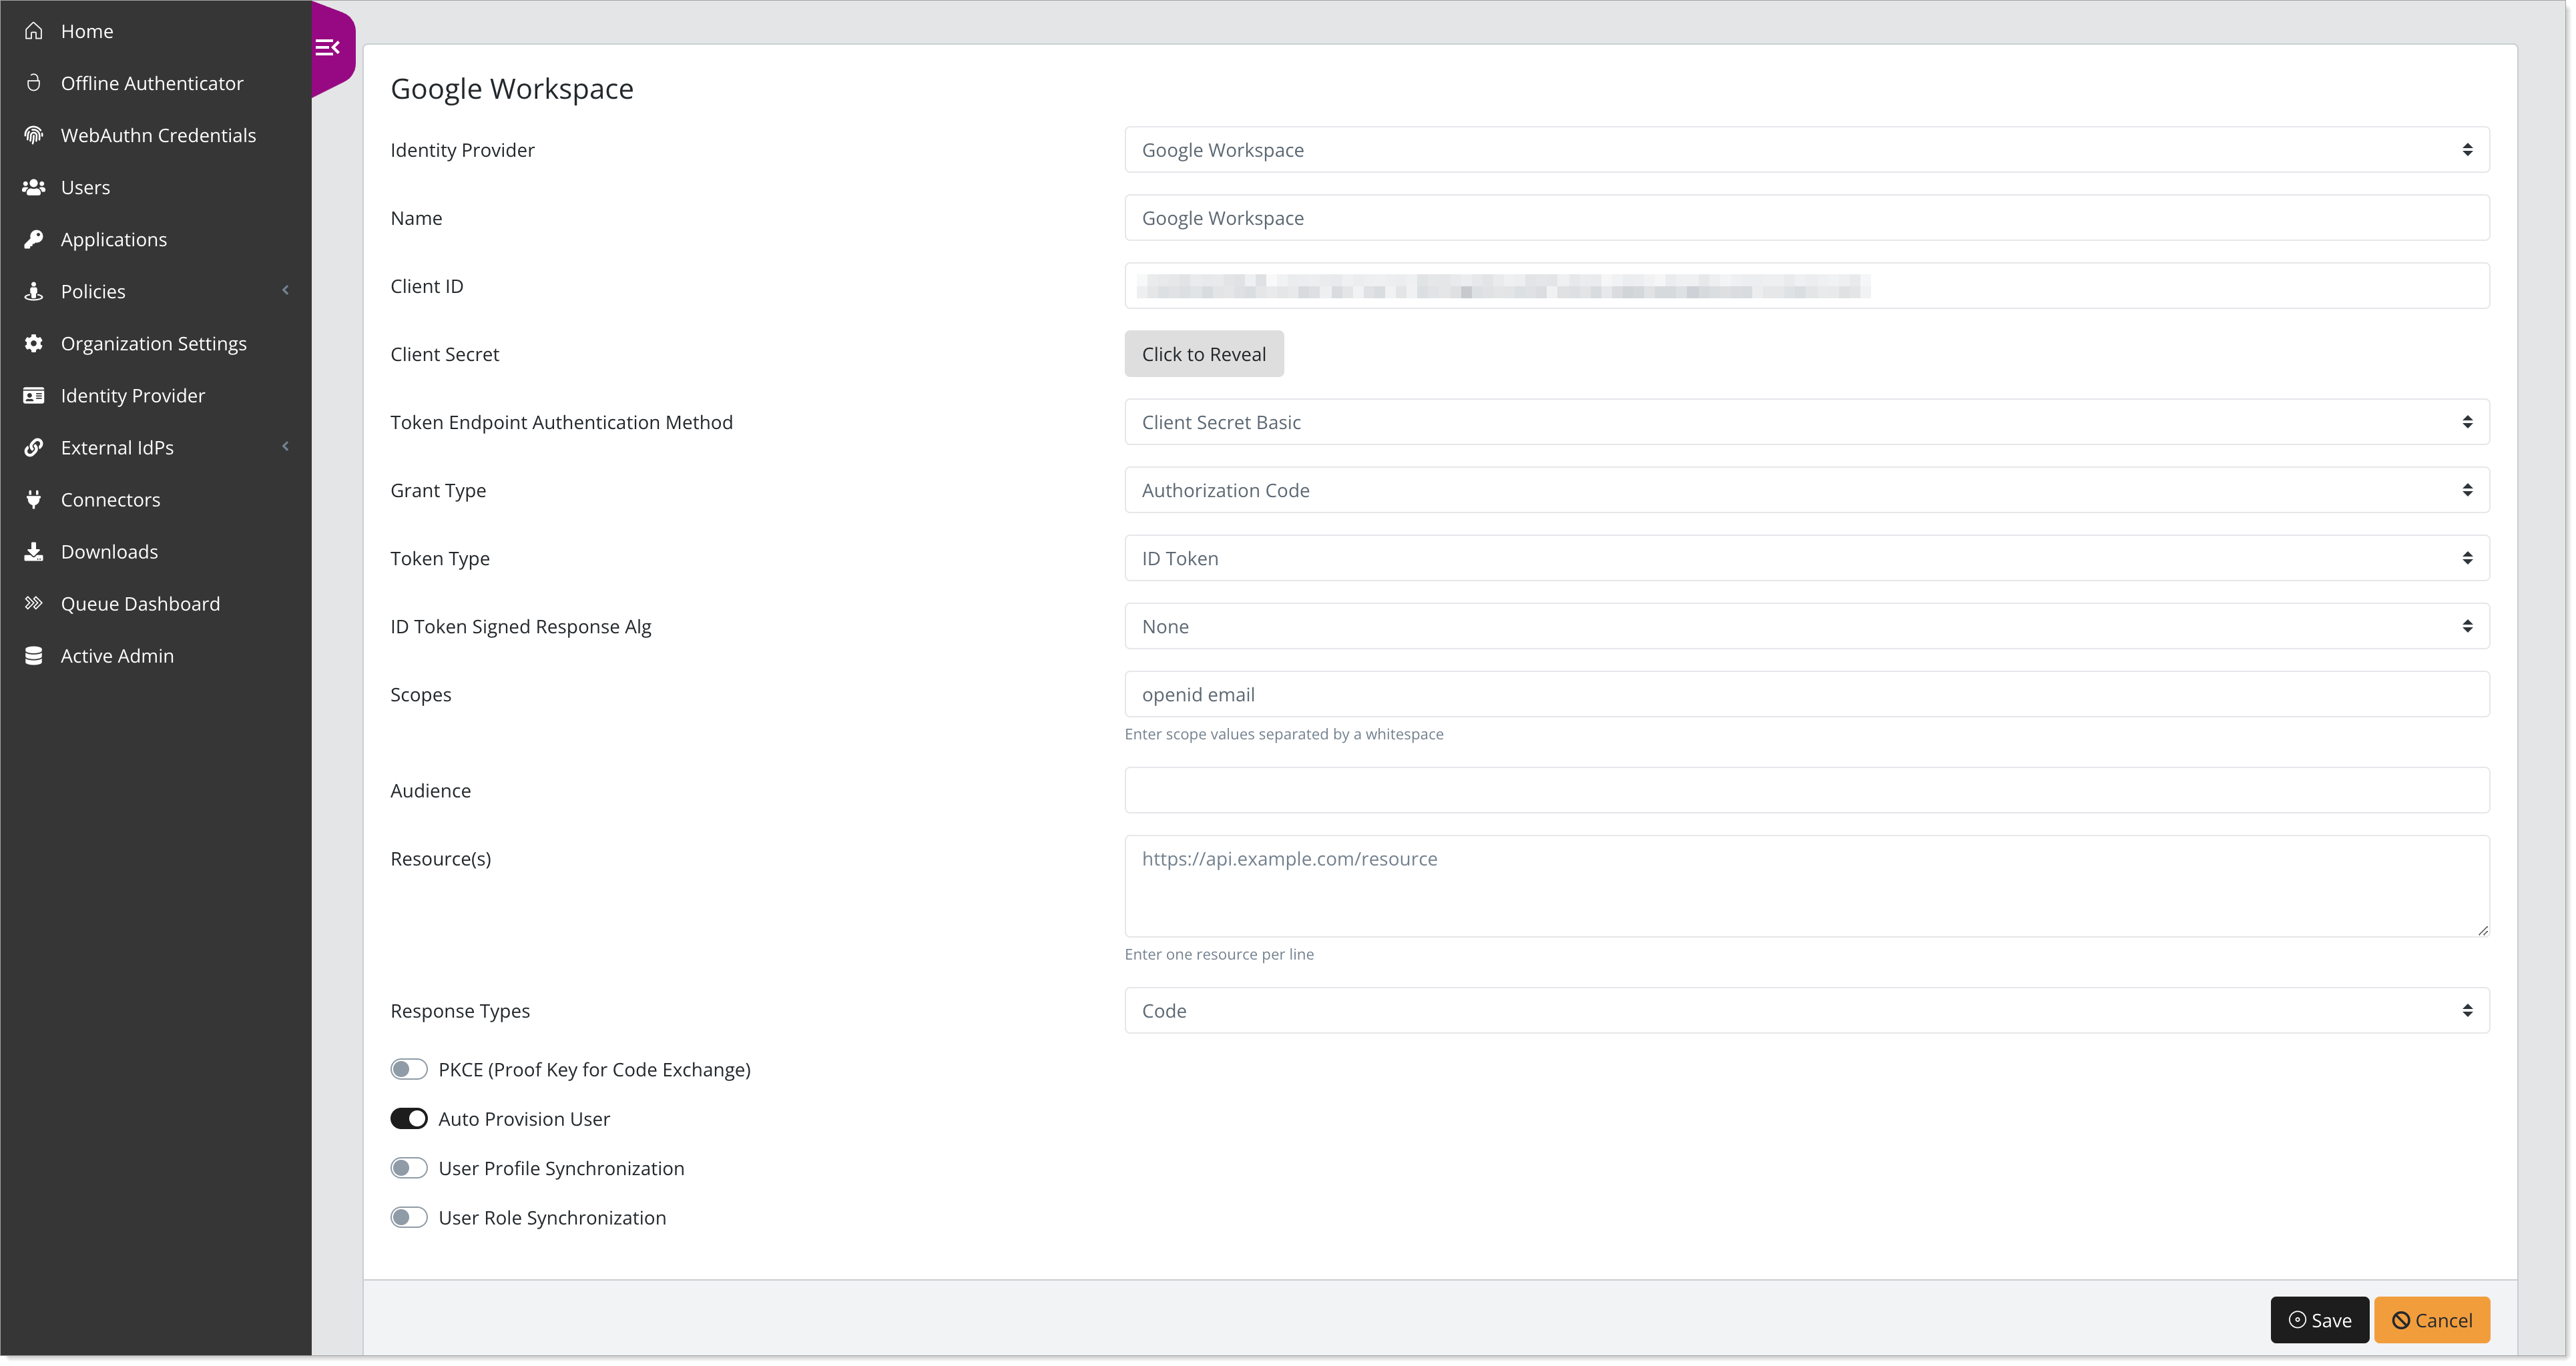
Click Create New Client and set the following configurations:
Identity Provider
Select the provider you created earlier in this section.
For example, Google Workspace.
Name
Enter a unique client name.
For example, Google Workspace.
Client ID
Enter the Client ID for the OAuth Client you created in the Google API Console.
Client Secret
Enter the Client Secret for the OAuth Client you created in the Google API Console.
Grant Type
Set to Authorization Code.
Token Type
Set to ID Token.
Scopes
Set to openid email.
Response Types
Set to Code.
Auto Provision User
Slide the toggle to On.
Save your changes.
Go to Organization Settings.
On the SSO tab, select the check box for SSO logins should only happen using configured external identity providers.
This ensures Google Workspace is used for username/password authentication during the SSO login flow.
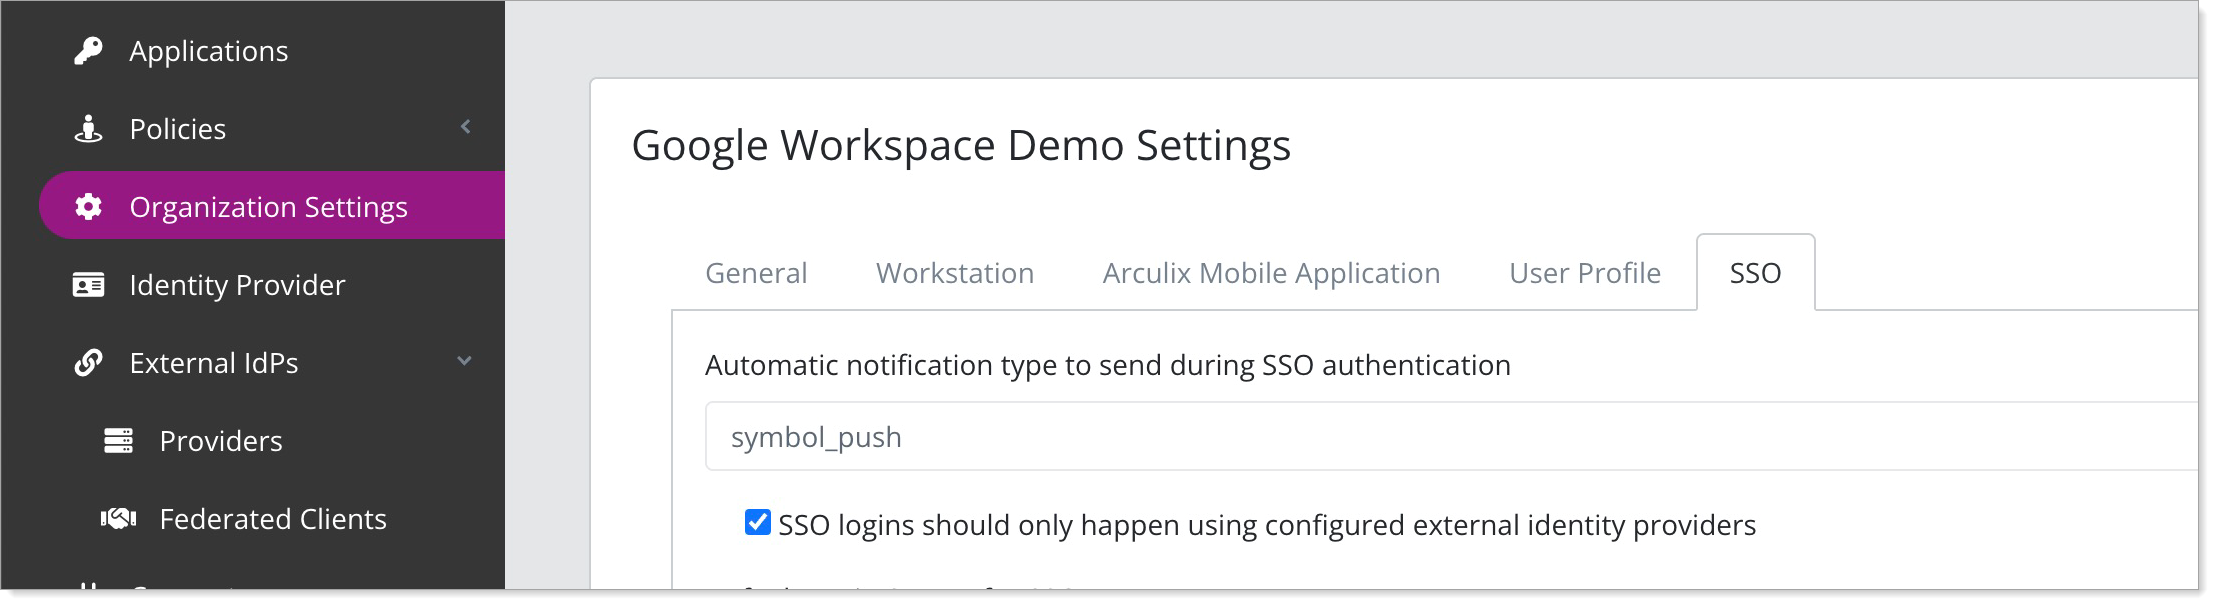
Save your settings.
Task C: Configure MFA for new users in Arculix
In this task, you will create a Device Enrollment Policy that allows new users to enroll in MFA using the Arculix Mobile app.
In Arculix, go to Policies > Advanced.
Click Create New Policy and set the following configurations:
Policy Name
Enter Force Device Pairing
Event
Set to Enrollment.
Applications
Select the Apply to All Applications check box.
When
Select the Always checkbox.
Action
Select the Require Device Pairing radio button.
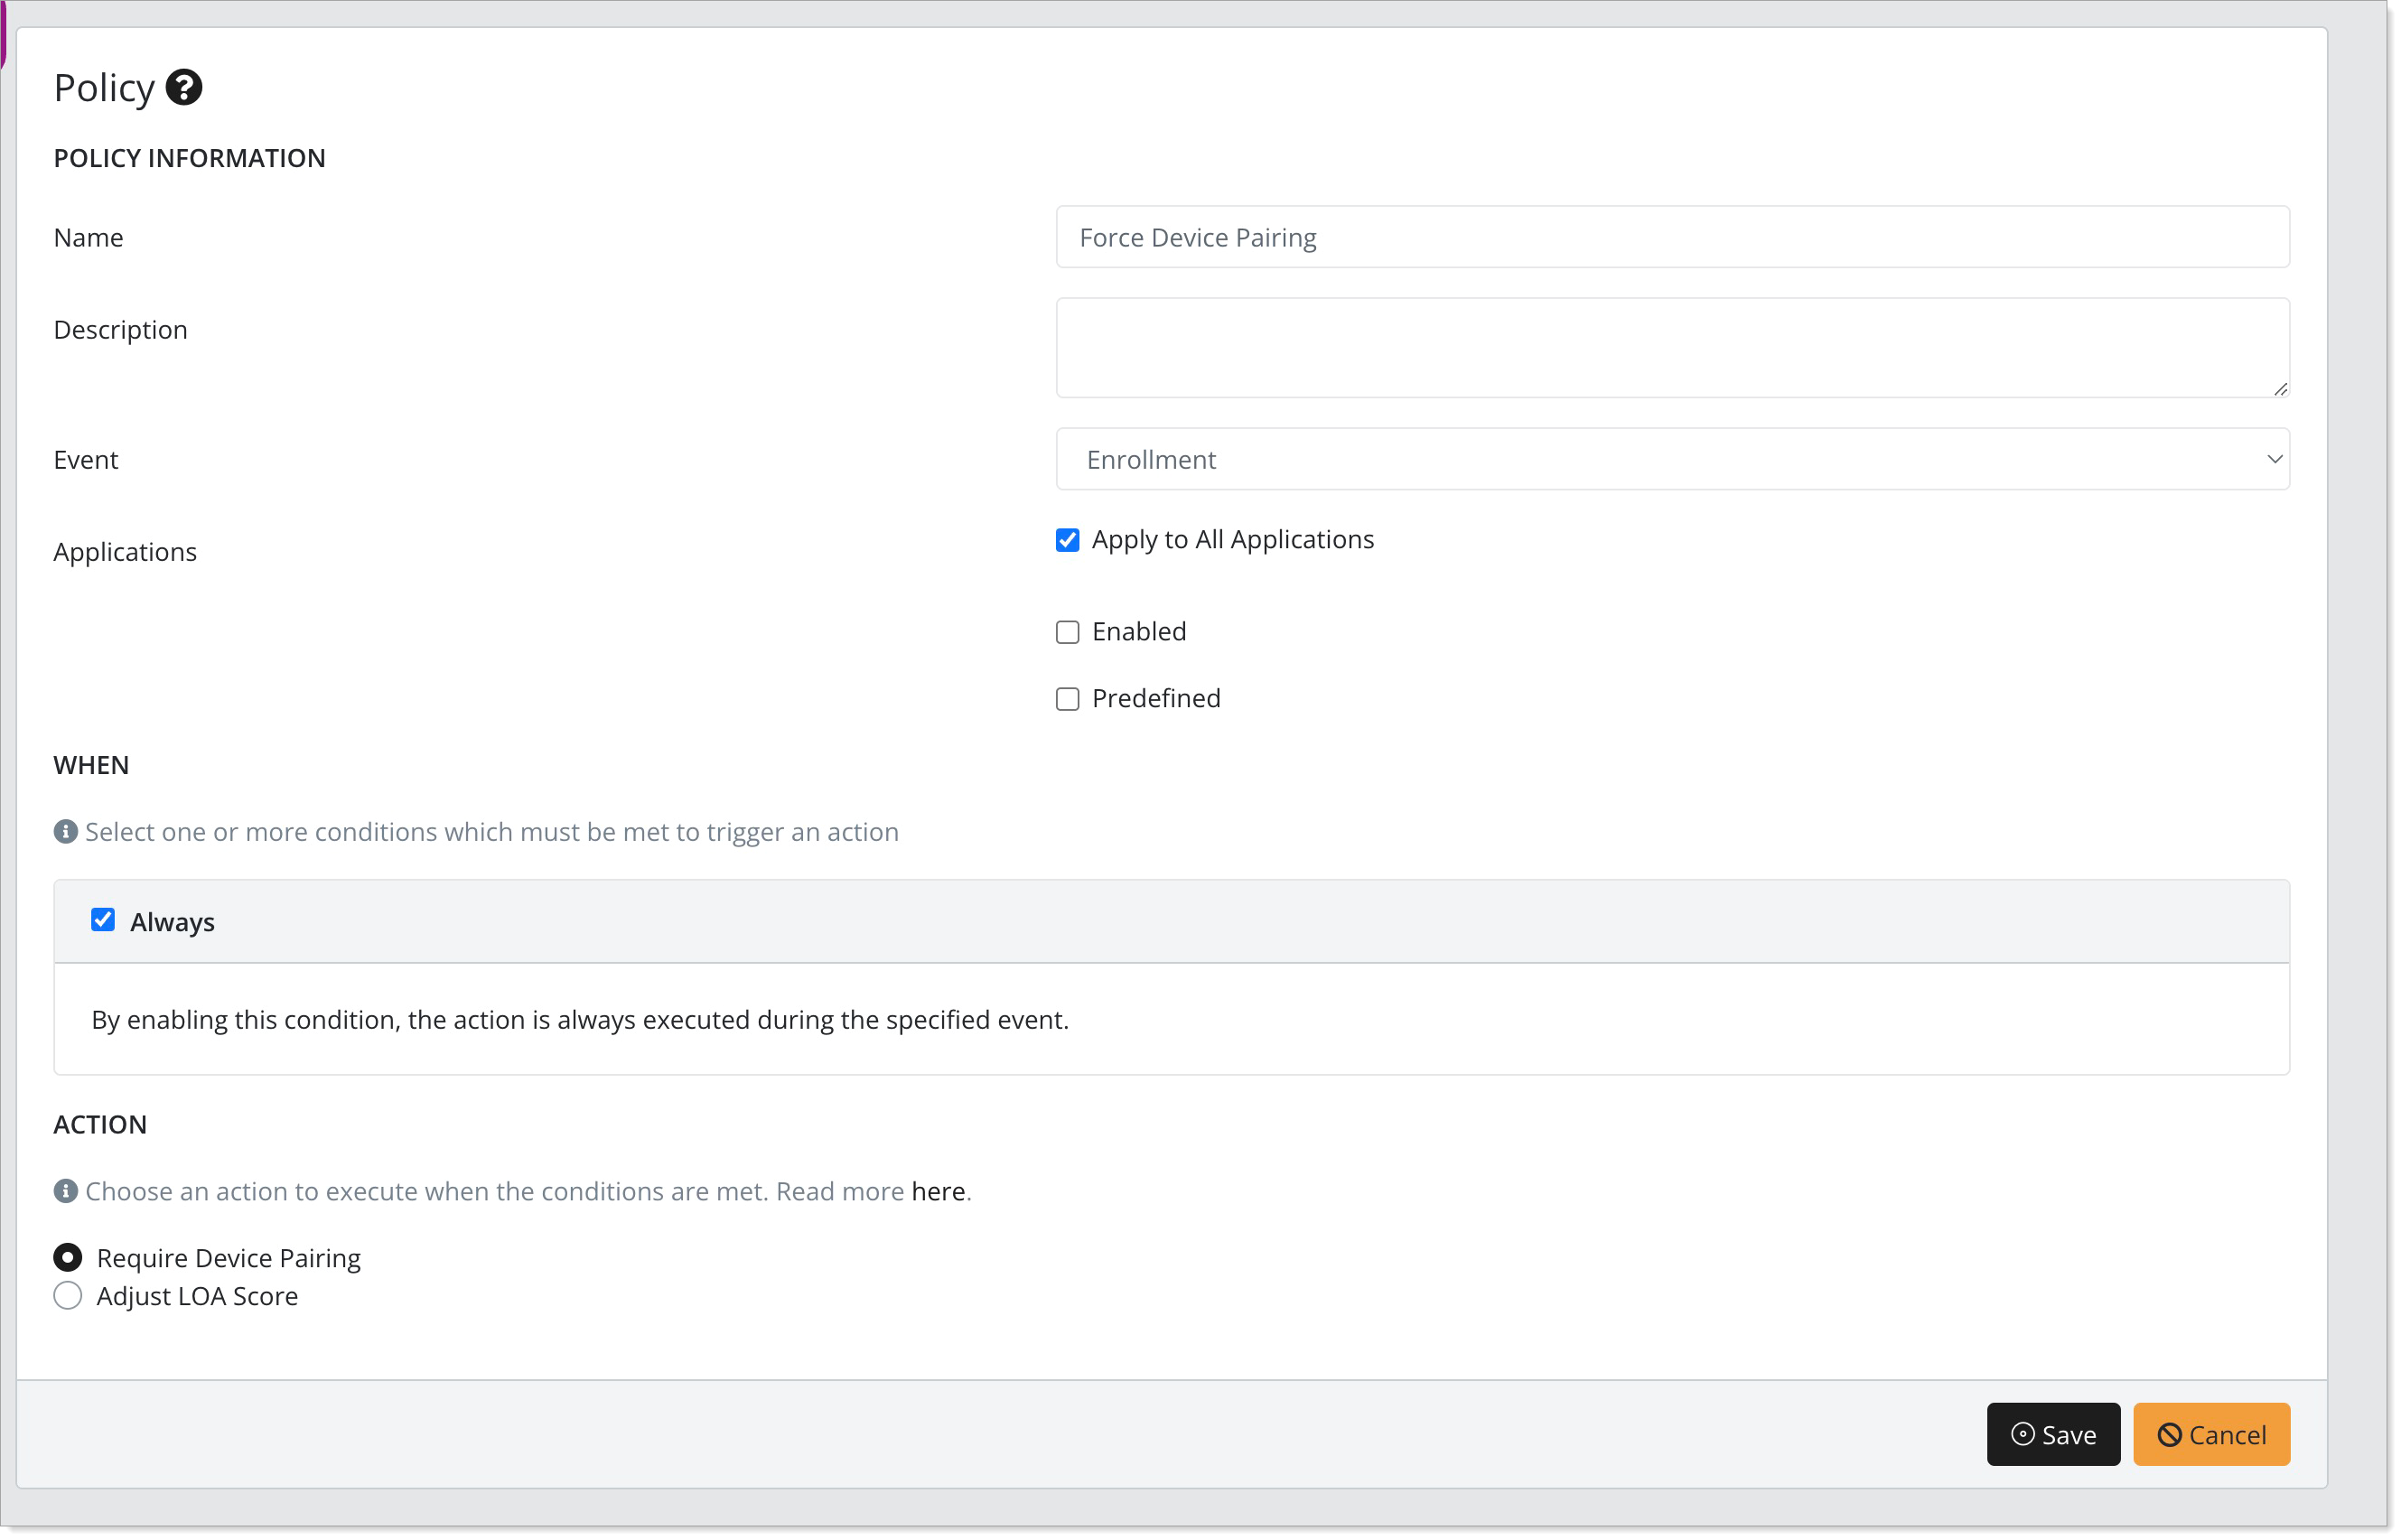
Save the policy.
Test your integration
Go to the following URL to test the SSO flow:
https://sso.acceptto.com/{TENANT}where{TENANT}is your organization’s URL identifier.You will be redirected to the Google Workspace sign-in page.
After entering your credentials for the first time, you will be prompted to grant consent to share your email and profile information with Arculix SSO application.
Once consent is granted, Arculix will complete the MFA pairing process. Users will follow this flow for all SAML and OIDC applications integrated with Arculix SSO.